Mapping
Le module Mapping permet de géolocaliser les contenus Omeka S. Les cartes peuvent aussi contenir des éléments temporels permettant de circuler dans les contenus de manière chronologique.
The Mapping module has no global configuration settings. It adds several new metadata fields to each item, and a new « Mapping » tab to each item edit screen, as well as several batch-editing options for items. It adds optional location-based search fields to the advanced search pages on the admin and public interfaces, controlled on a site-by-site basis by Site Settings. It also adds page blocks to Site Pages that can display maps and timelines for browsing, and a « Map Browse » page, found in the Site Navigation settings.
Mapping can work with the Collecting module, by allowing users filling out the contribution form to provide geolocation data for their submissions. Users click directly on a map to place a marker, and can optionally provide a text label for the marker. See the Collecting module page for more information.
Mapping can work with the CSV Import module, allowing geolocation data to be added in bulk. See the CSV Import integration section below for more information.
Using maps
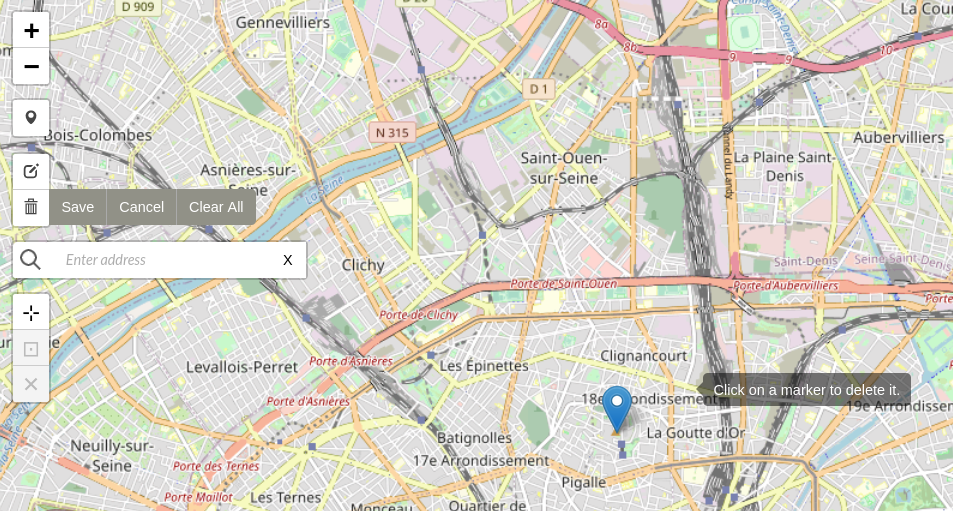
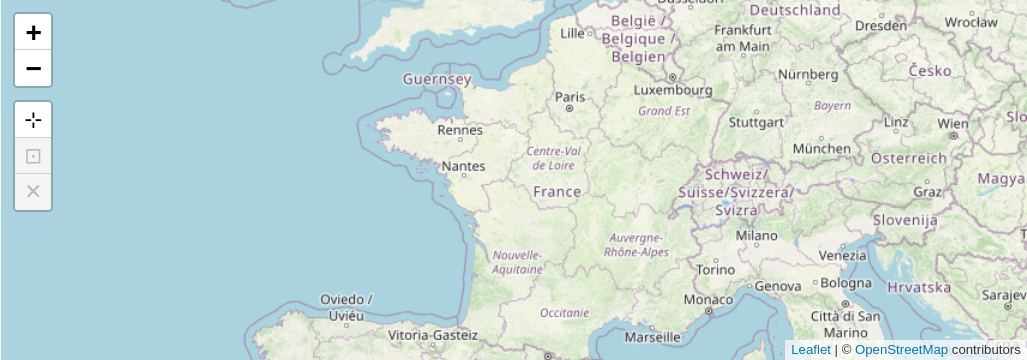
Des petits boutons blancs sur la gauche de la carte permettent de contrôler et modifier son aspect. Passer la souris dessus pour voir les conseils d’utilisation.
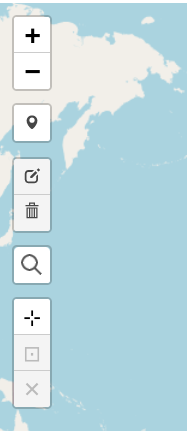
Zoom in : Petit carré blanc avec un signe plus. Chaque clic permet de zoomer une fois (entre 0 et 19).
Zoom out : Petit carré blanc avec un signe moins. Chaque clic permet de dézoomer une fois (entre 0 et 19).
Draw a Marker : Petit carré blanc avec une marqueur de position. Quand vous cliquez sur ce bouton, votre curseur devient un marqueur bleu. Cliquez sur la carte pour positionner le marqueur.
Move Marker : Petit carré blanc avec une icône de crayon et de papier. Cette option n’est utilisable qu’après avoir placé un marqueur. Cliquez sur ce bouton pour faire apparaître une boîte rose autour du marqueur. Cliquez sur le marqueur pour le déplacer. Cliquez de nouveau pour le positionner. Utilisez les boutons gris pour sauvegarder ou annuler.
Delete Marker : Petit bouton blanc avec une icône de poubelle. Cette option n’est disponible qu’après l’ajout d’un marqueur. Cliquez sur l’icône pour sélectionner le marqueur. Cliquez sur le marqueur à supprimer. Utilisez les boutons gris pour « Enregistrer » ou « Annuler ».
Search Address : Petit carré blanc avec une icône de loupe. Cliquez pour saisir une adresse dans la barre de recherche.
Set the current view as default view : Petit carré blanc avec un symbole en forme de croix. La vue par défaut de la carte est dézoomée. Cliquez pour définir la vue actuelle comme vue par défaut pour ce contenu.
Go to current default view : Petit carré noir avec un boîte noir autour d’un point. Cette option n’est disponible qu’une fois une vue par défaut établie. Cliquez pour activer la vue sélectionnée pour ce contenu.
Clear the default center and zoom level : Petit carré blanc avec un « X ». Cette option n’est disponible qu’une fois une vut par défaut établie. Cliquez pour désélectionner la vue choisie et revenir à la vue générale de départ.
In addition to these options, you can also navigate the map using your mouse or trackpad by scrolling to zoom and clicking and dragging to pan. Scrolling using your mouse wheel is a setting that can be turned on or off in map page blocks.
Cartographier un contenu
The Mapping module adds metadata fields to each item: a latitude and longitude pair that creates markers on maps (an item can have more than one marker), as well as default display settings for the item’s individual map - minimum corner coordinates that ensure the map contains at least those top, bottom, left, and right spots. These can be set manually using the item’s « Mapping » tab, or can be bulk-added to many items using CSV Import.
Add markers
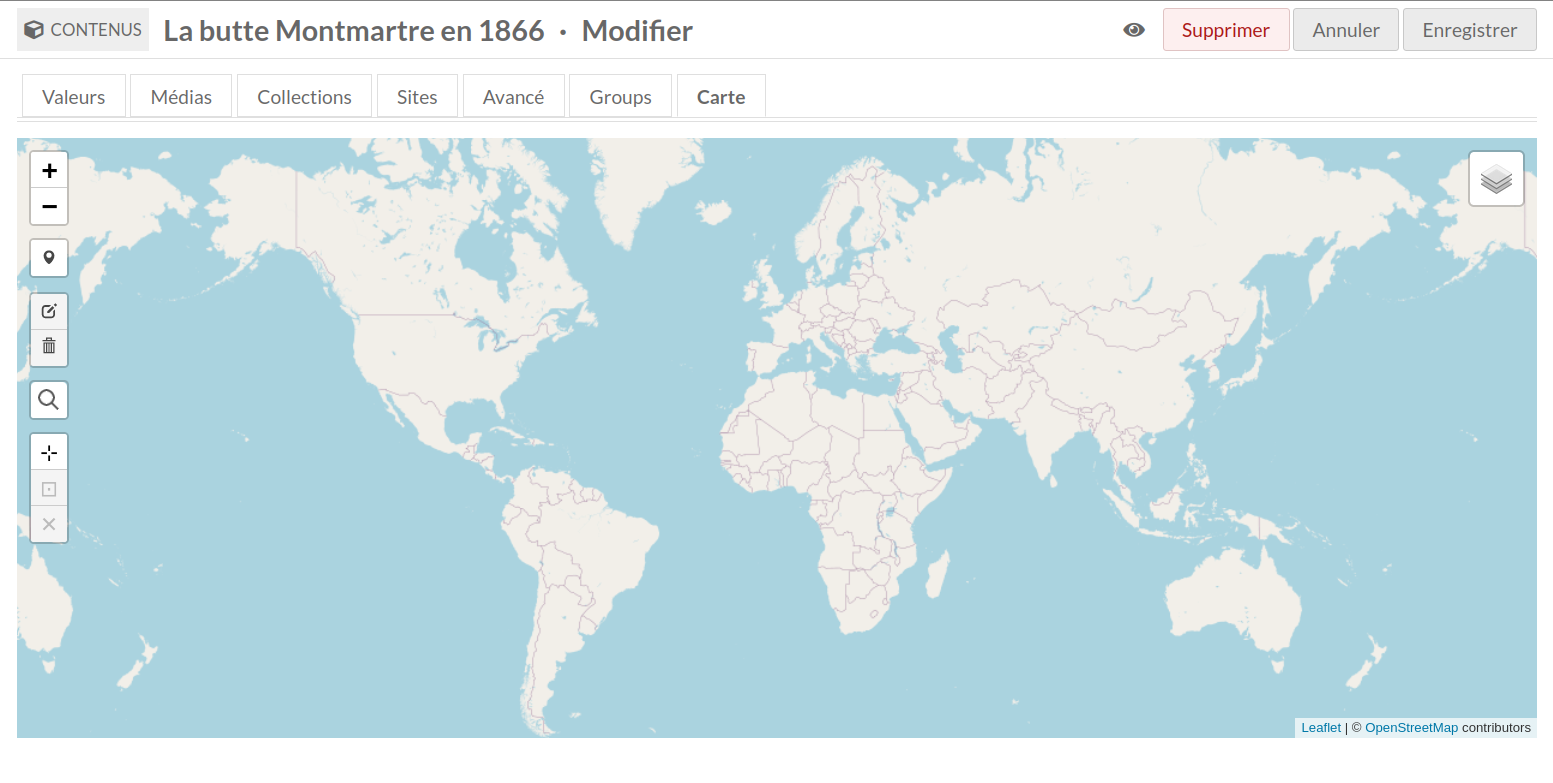
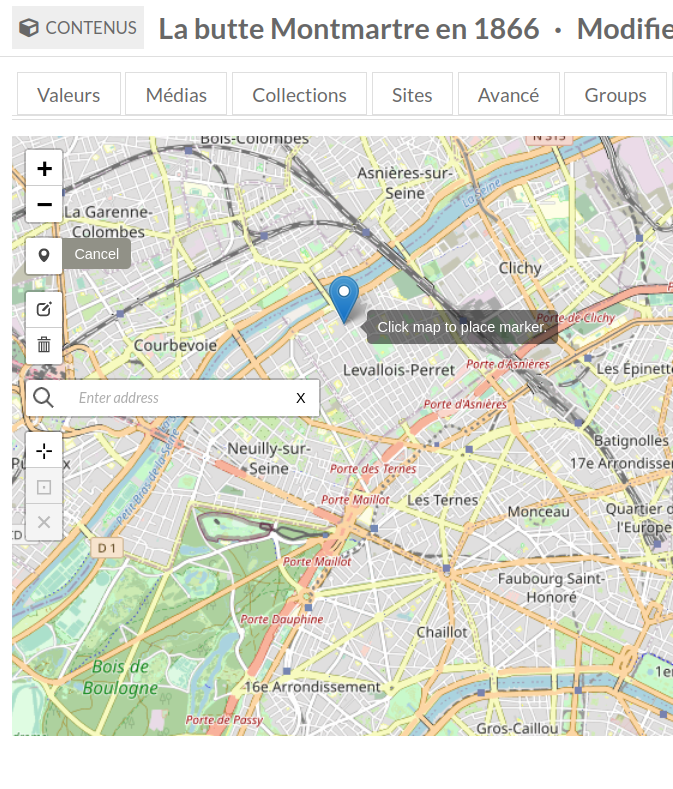
The item view screen will not show a « Mapping » tab unless there is geolocation metadata, but one will appear when editing the item. To add a map to an item, click to edit the item. Navigate to the « Mapping » tab to add location data to the item. Selecting the tab will open the map interface.
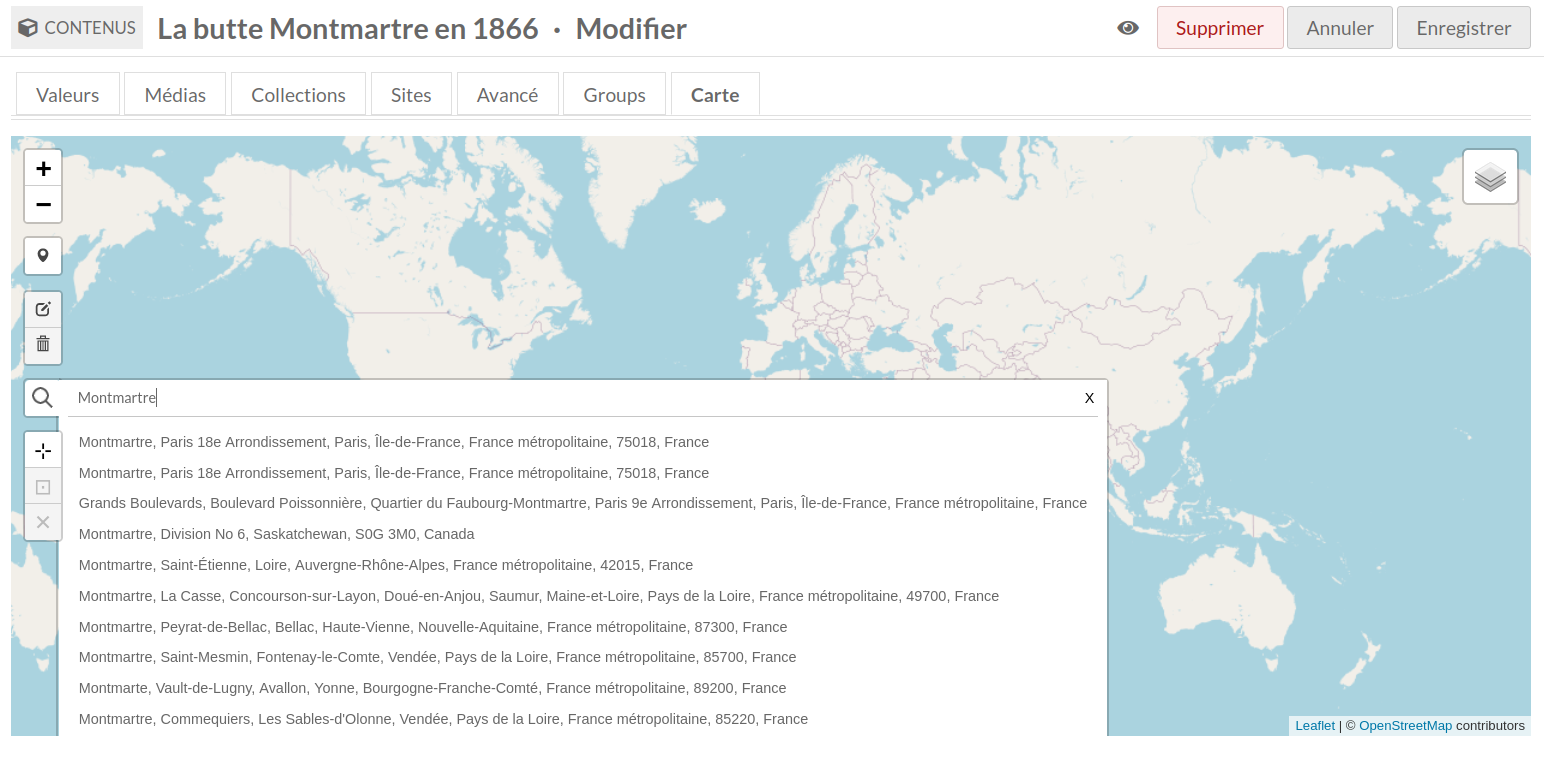
Pour trouver le point où vous souhaitez situer le marqueur, vous pouvez procéder d’une des manières suiavntes :
Zoomer et vous déplacer sur la carte pour trouver la localisation.
Saisir le nom du lieu dans le champ Search Address (voir Figure 4 ci-dessous).
Cette action fait apparaître des propositions d’adresses au fur et à mesure que vous remplissez le champ et ne cherche pas les localisations qui ne correspondent pas au formatage de la fonction de recherche.
Saisissez des coordonnées de latitude et de longitude dans le champ de recherche. Celles-ci doivent être des décimales comme
38.897222, -77.064167, et non38° 53′ 50″ N, 77° 3′ 51″ W.
Click on the Draw a Marker tool in the left hand toolbar. Your cursor will become a marker which can move around the map. To set the point, click on the map.
Edit markers
Vous pouvez ensuite cliquer sur le marqueur pour lui ajouter une étiquette qui apparaîtra sur la vue publique de la carte du contenu. Cette étiquette apparaît dans une police de taille importante.
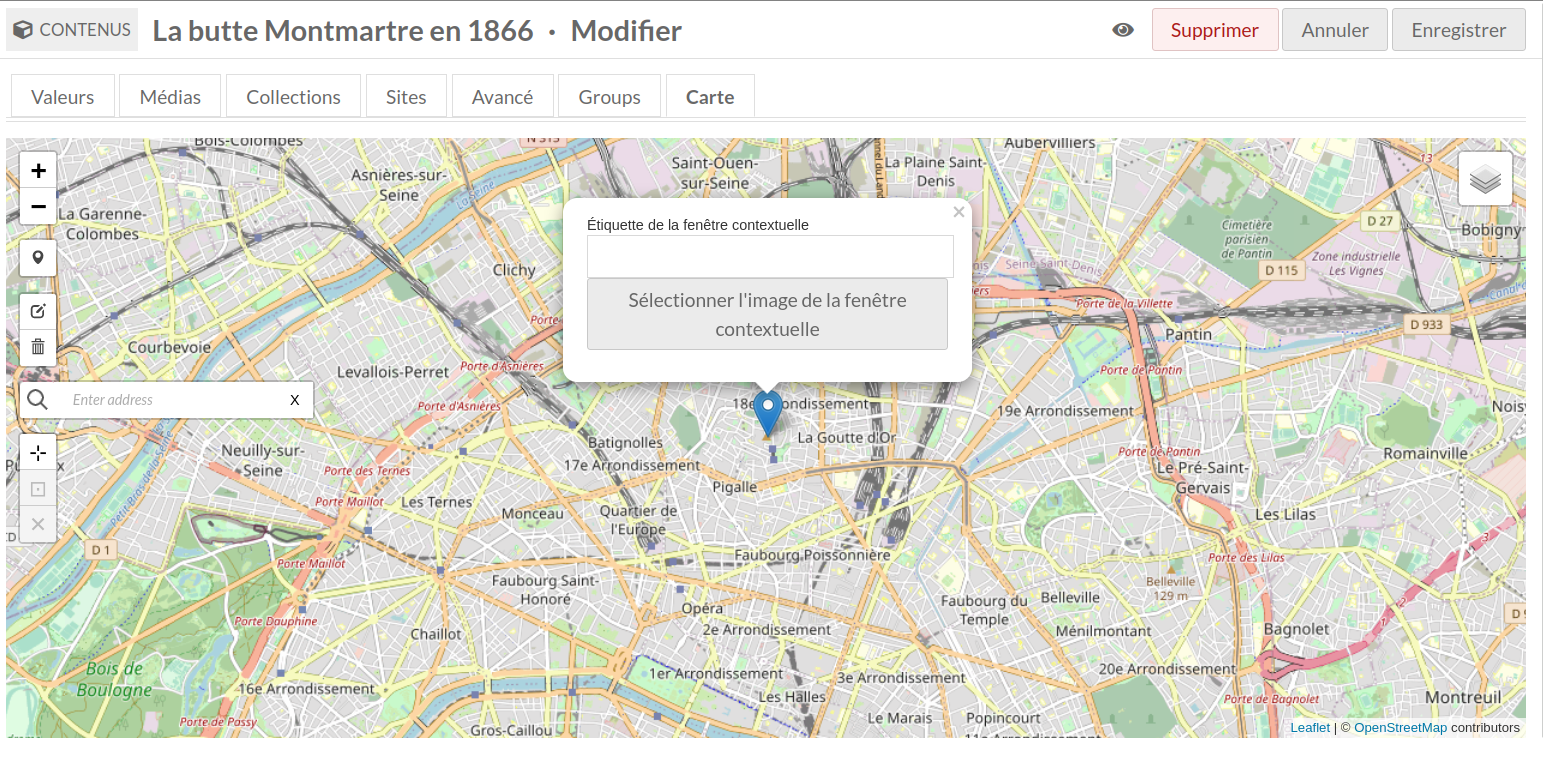
Quand vous ajoutez une étiquette, vous pouvez aussi ajouter une image qui apparaîtra sur le marqueur quand il sera cliqué sur la vue publique. Vous pouvez sélectionner uniquement une image qui est déjà attachée au contenu comme média. Pour retirer cette image, sélectionnez « No image » dans la barre latérale.
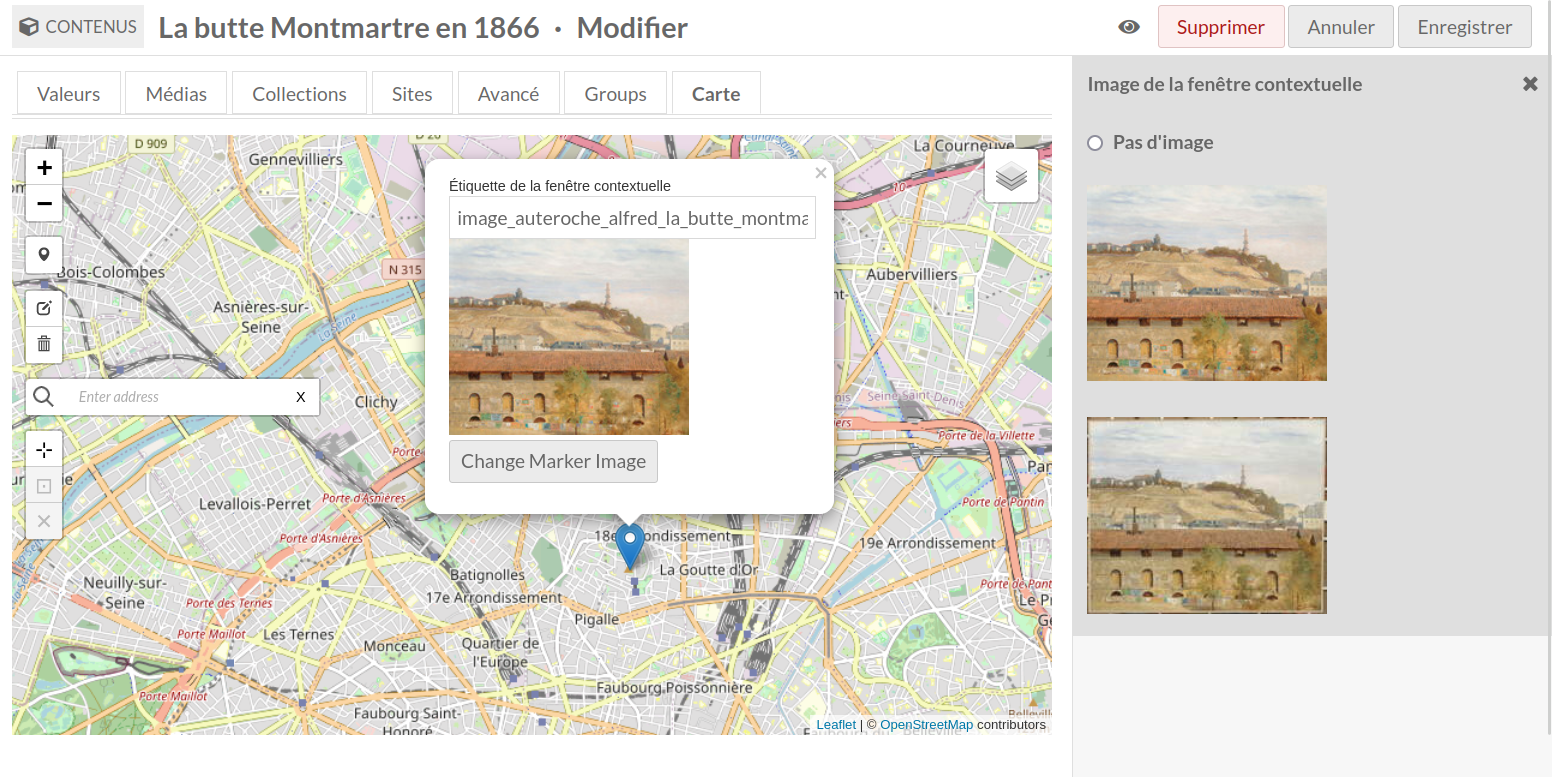
To edit the label or image again, click on the marker. This will open the options for the label and image, as seen above.
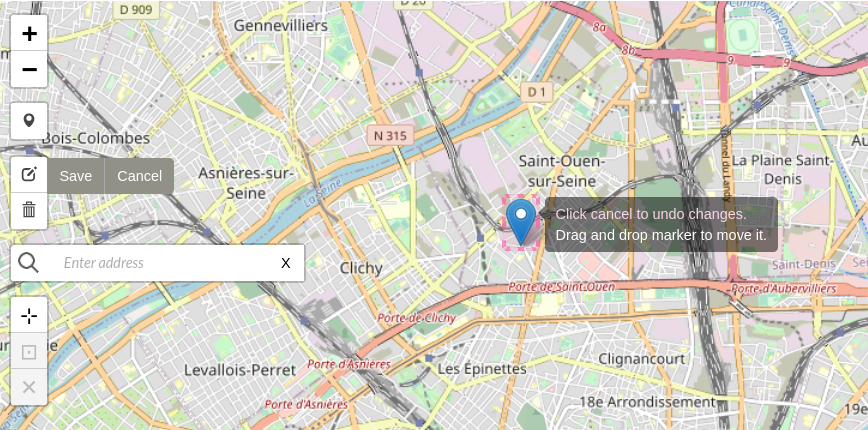
To move a marker you have added, use the « Move markers » button on the left hand toolbar (small white square with black box and pencil icon). Any marker on the map will become highlighted in a red, dotted-line outline. Click and drag the marker you want to move.
To apply your changes, click the « Save » option which opens from the « Move markers » button. If you do not save, the marker will not be moved.
To delete a marker, first click the « Delete markers » button in the left hand toolbar (trash can icon). Click on the marker you want to delete; this will remove the marker from the map. In order to make the deletion permanent, you must click « Save » in the menu which opens from the « Delete markers » button.
Note that you can use the « Clear all » button in the menu which opens form the « Delete markers » button to clear all markers on the map.
Map display
Vous pouvez aussi déterminer le niveau de zoom et le centre par défaut de la carte, indépendamment du ou des marqueur(s) positionnés. Par défaut, le centrage se fait sur un des marqueurs avec un zoom maximal ou suffisamment dézoomé pour contenir tous les marqueurs dans l’affichage de la carte.
Set the current view as default view : Petit carré blanc avec un symbole en forme de croix. La vue par défaut de la carte est dézoomée. Cliquez pour définir la vue actuelle comme vue par défaut pour ce contenu.
Go to current default view : Petit carré noir avec un boîte noir autour d’un point. Cette option n’est disponible qu’une fois une vue par défaut établie. Cliquez pour activer la vue sélectionnée pour ce contenu.
Clear the default center and zoom level : Petit carré blanc avec un « X ». Cette option n’est disponible qu’une fois une vut par défaut établie. Cliquez pour désélectionner la vue choisie et revenir à la vue générale de départ.
Search for map data
Items with information filled out in their mapping metadata fields (i.e. with markers on the map) can be searched with fields that the Mapping module adds to the advanced search fields in the admin and public views.

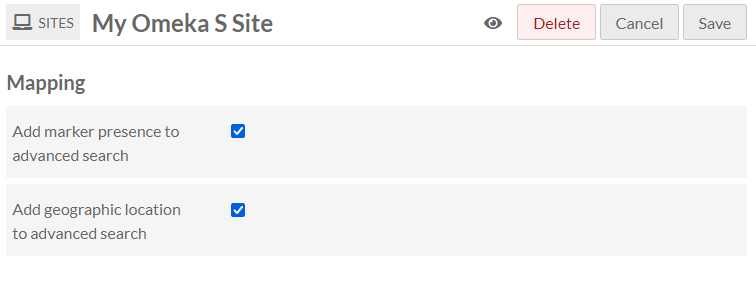
The public fields are optional (turned off by default) on individual sites. « Add geographic location to advanced search » will add three fields that allow users to search by location: they must provide an address, as well as a distance (in numbers) and select a unit (kilometres or miles). « Search by map marker presence » provides users with the values of « Has map markers » or « Has no map markers ».
Batch-edit map data
Users can select multiple items and perform batch editing to create and edit map markers. The options are:
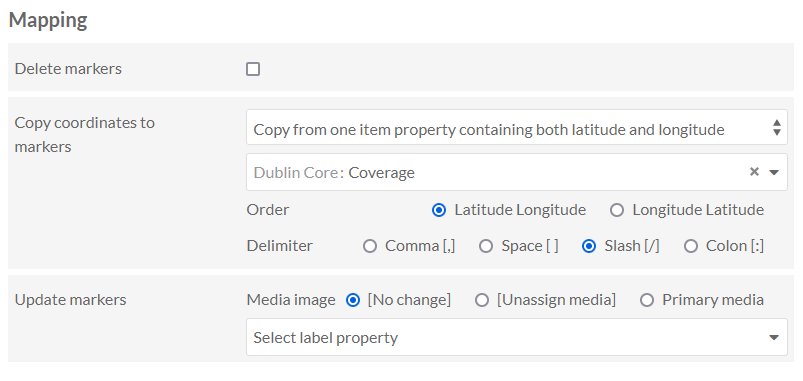
Delete markers: You can batch-remove all existing markers from multiple items.
Copy coordinates to markers: This involves taking latitude and longitude data from an existing metadata value on each item or from their associated media. This will append new markers, not overwrite any existing markers. If there are multiple values on an item in the chosen proprerty, this will batch-copy them all as multiple markers. You can specify:
Which fields contain each or both values
How they are separated (the operation will ignore spaces)
Whether the longitude or latitude comes first in the pair. If you copy coordinates from an attached media, you can also check a box to assign the media as a marker image.
Update markers: Markers can have customized thumbnails and labels rather than displaying just the item title as a link. You can batch-edit marker customization by:
Removing images
Using items” primary media as images
Copying labels from an existing metadata value (either from the item, the primary media, or the media already assigned to the marker)
Removing labels (the first entry in the dropdown).
Note that marker labels have a limit of 255 characters. You will see your labels truncated if you copy label text from a field containing values longer than 255 characters.
If the chosen field in this batch operation does not contain valid entries, the item(s) will be skipped and you will not see an error message. Batch-editing operations do not appear in the Jobs log unless they are « Edit all, » so if you have done a selected-items batch-edit you may not be able to trace which items were modified.
You may wish to copy your coordinates in one batch operation, then update those markers with labels and images in a second batch operation. Note that if an item has multiple markers, all markers will get a marker update of identical images and labels.
Intégration avec Import CSV
Mapping is compatible with CSV Import when importing items (but not when importing mixed resources).
If the two modules are enabled, your CSV Import process will have a new « Mapping » dropdown menu in the « Add mapping » sidebar when you are connecting a spreadsheet column to a property.
The « Mapping » dropdown menu includes three options for pinning the item geographically: « Latitude », « Longitude », and « Latitude/Longitude ». Make sure your « Latitude/Longitude » values are separated with a slash (/) character.
These must all be supplied as numerical values, not degree: write northern latitudes as positive numbers and southern latitudes as negative numbers (« -90 » to « 90 »), eastern longitudes as positive numbers and western longitudes as negative numbers (« -180 » to « 180 »).
!!! note
The latitude and longitude fields cannot take multiple values, that is, you cannot bulk-import two or more markers for each item using these fields. You also cannot import multiple latitudes and longitudes using the « Append » method in CSV Import to import multiple rows of data onto the same item. You can add multiple values using the « Latitude/Longitude » field. This will take input in the form of lat/long;lat/long, where the semi-colon is the multivalue separator you indicate in the CSV Import settings.
The « Default Bounds (sw_lng,sw_lat,ne_lng,ne_lat) » option allows you to set four corner coordinates for the map that displays for that item, in the format sw_lng,sw_lat,ne_lng,ne_lat (bottom left longitude, bottom left latitude, top right longitude, top right latitude). Map widths and heights display dynamically depending on the page and the browser window, so your four coordinates will be centered within the map and excess space will display either vertically or horizontally as applicable. Be careful to provide longitudes first and latitudes second in your bounds values.
!!! note The default bounds field will not accept multiple values. You will encounter an error with your entire CSV Import process if you attempt to Append a second default bounds value to an item. At this time you will also encounter an error for the entire process if you attempt to Revise or Update an existing default bounds value on an item; the error message will not specify which rows worked successfully, but the log will identify the item where the process stopped by its unique ID. You must manually erase default bounds from each item individually if you wish to change those settings. Mapping properties do not appear in bulk-editing options.
For example, to pin an item near Madrid and set the map bounds around the country of Spain, you could provide two values: a marker latitude and longitude of « 40.79864618/-3.645817429 » and default bounds of « 4.25300,43.95470,-12.12392,36.45605 ».
Note that the default bounds will ignore any location markers. For example, if you set bounds around Spain, but your item’s marker is pinned to Antarctica, the map will display Spain and users will have to search for the marker manually.
Vous ne pouvez pas déterminer d’étiquette ou d’image de marqueur via Import CSV.
You cannot batch-edit mapping values after items are in your system, only edit them manually one item at a time, or batch-revise mapping data using CSV Import.
Add maps to a site
Map Browse page
Mapping creates a « Map Browse » page that can be added to each site in its navigation settings. This map has minimal customization options and will show every item in the site that has one or more geolocations, as well as some advanced search fields (including search by address with radius). These fields are not affected by site settings. The title of the page will be « Map ».
Go to a Site, then go to Navigation. You will see under « Add a custom link » the option to add a « Map Browse. » When this is added to your navigation, you will be able to change the label that appears in the navigation (default is « Map Browse »), and the basemap, by clicking on the pencil icon to edit the Map Browse page settings. Note that changing the basemap will change the URL that is added to the navigation - for example, yoursite/map-browse?mapping_basemap_provider=Stamen.Watercolor.
The Map Browse page will show slightly different markers than other maps. Rather than display the item title, it will link with « View item ». If media has been used to add an image, it will also display « View media » as a link.
If markers have not been customized, the viewer will simply see « View item ».
Page blocks
Mapping creates two page blocks you can add to your site pages: « Map by attachments », where you manually add resources to the map block; and « Map by query », which allows you to use a search string to add resources to the map block.
To add a map to a page, click to edit the page. On the right, under « Add new block », click either the « Map by attachments » or « Map by query » option (1). Selecting one will open the map block to the page (2). The blocks include customizable features for the map in collapsable panes. Click the triangle to expand or collapse these fields (3).
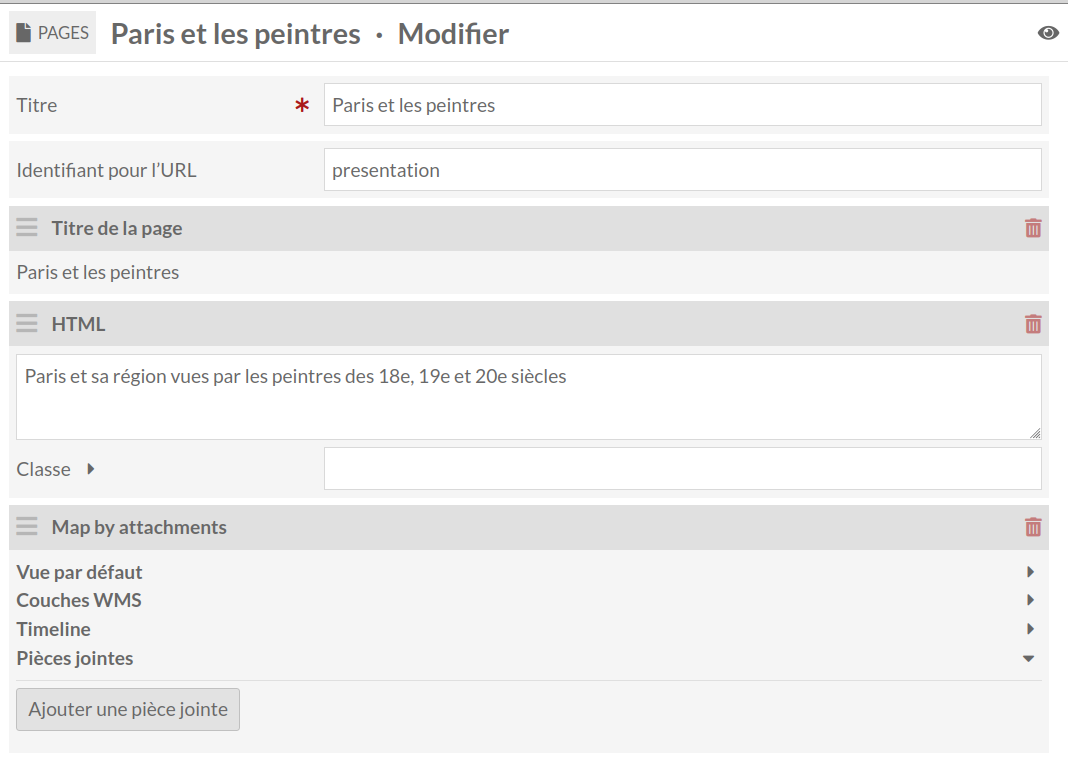
The « Map by attachments » and « Map by query » blocks have largely the same settings, with the exception of the methods for adding items to the map.
Vue par défaut
Cette section permet de définir l’apparence et le niveau de zoom de la carte. Il y a trois champs et une carte de prévisualisation, qui contient des boutons pour établir le zoom et la localisation par défaut. Si vous ne définissez pas de zoom ou de localisation par défaut, la carte s’ajuste pour afficher toutes les ressources.
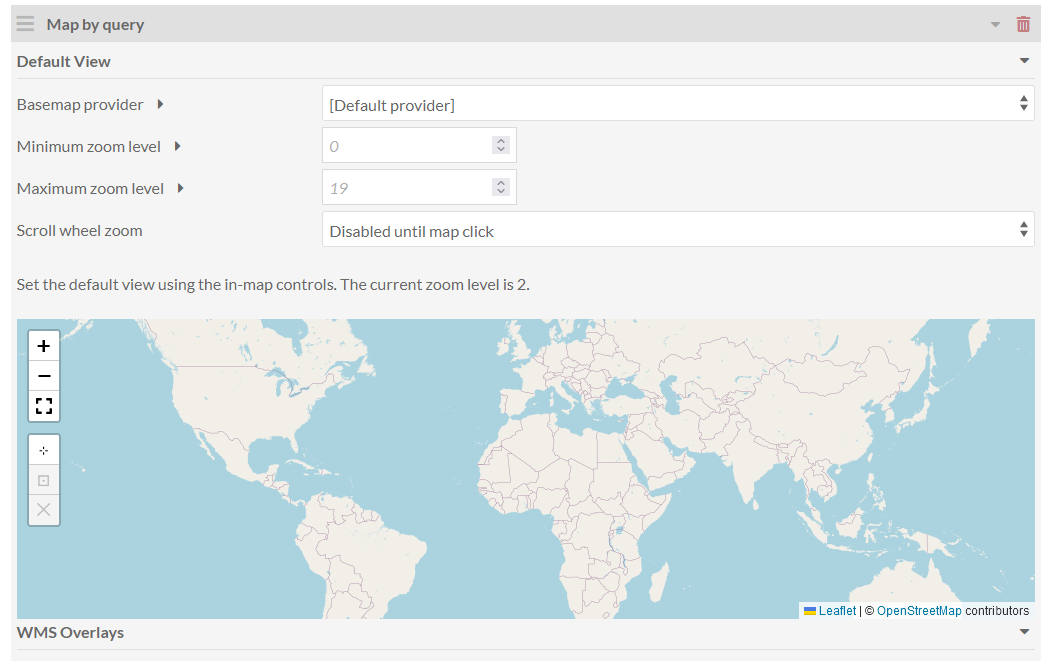
Basemap provider : menu déroulant de fournisseurs pour la carte de base. Une fois sélectionnée, la carte de prévisualisation s’actualise. Le fournisseur par défaut est « OpenStreetMap.Mapnik ».
Minimum zoom level : définir le niveau de zoom minimum de la carte. Le plus dézoomé correspond à 0.
Maximum zoom level : définir le niveau maximum de zoom pour la carte. Le plus zoomé correspond à 19. Certaines cartes de départ ne fonctionnent pas à ce niveau de zoom ; vérifiez que vous définissez un niveau de zoom maximum auquel la carte reste visible.
Scroll wheel zoom: set whether users can zoom with their mouse wheel when hovering over the map, either automatically upon page load or after clicking inside the map. You can disable mouse-wheel scrolling entirely.
Entre les champs et la carte, un message indique le niveau de zoom actuel. Utilisez cette information pour déterminer quels niveaux de zoom maximum et minimum choisir.
Sur la carte de prévisualisation elle-même, il y a cinq boutons :
Zoom in : Petit carré blanc avec un signe plus. Chaque clic ajoute un niveau de zoom (entre 0 et 19).
Zoom out : Petit carré blanc avec un signe moins. Chaque clic retire un niveau de zoom (entre 0 et 19).
Set the current view as default view : Petit carré blanc avec un symbole de cible. La vue par défaut est globale. Cliquez pour établir la vue actuelle comme vue par défaut.
Go to current default view : Petit carré blanc avec une boîte entourant un point. Cette option n’est disponible qu’une fois la vue par défaut établie. Cliquez pour revenir à cette vue.
Clear the default center and zoom level : Petit carré blanc avec un « X ». Cliquez pour retirer les préférence et revenir à la vue globale de départ.
Couches WMS
Add, edit, and delete Web Map Service (WMS) overlays.
Libellé : Créez un libellé pour la couche WMS. Celui-ci sera visible par les utilisateurs et doit permettre de différencier les couches.
URL de base : Ajoutez une URL à la carte WMS.
Layers: Any layers you wish to use, separated by commas. This is a string or strings provided by the WMS host.
Styles: Any styles you wish to use, separated by commas. This is a string or strings provided by the WMS host.
Click « Add Overlay » to create the overlay. Click « Clear Inputs » to clear each of the fields. Multiple overlays can be added.
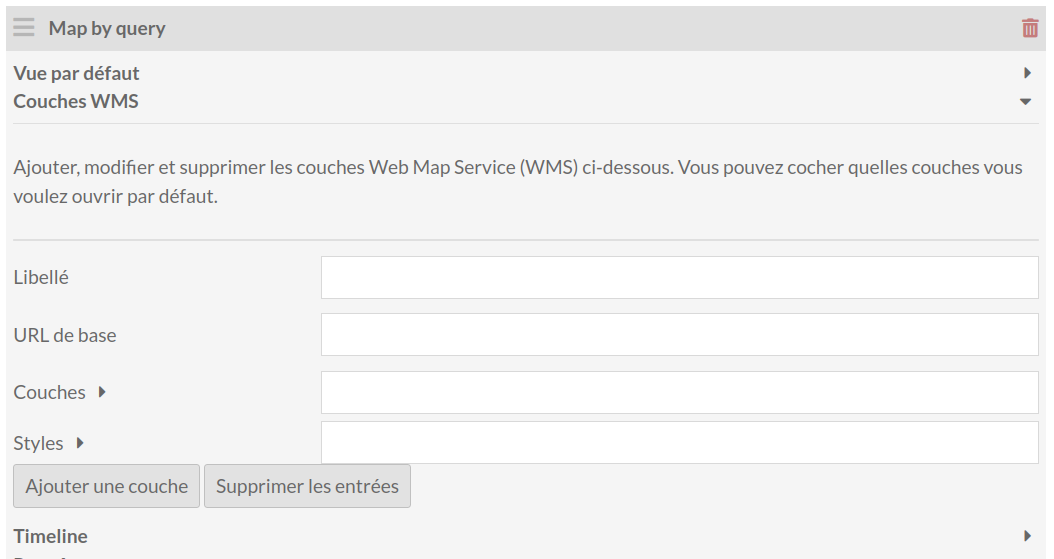
Once you have added an overlay, it will appear above the fields for adding overlays. If you would like one or more of the overlays to display automatically when the page loads, check the box next to it. Edit an overlay by clicking on on the red pencil edit button, or click the red trashcan icon to delete the overlay.
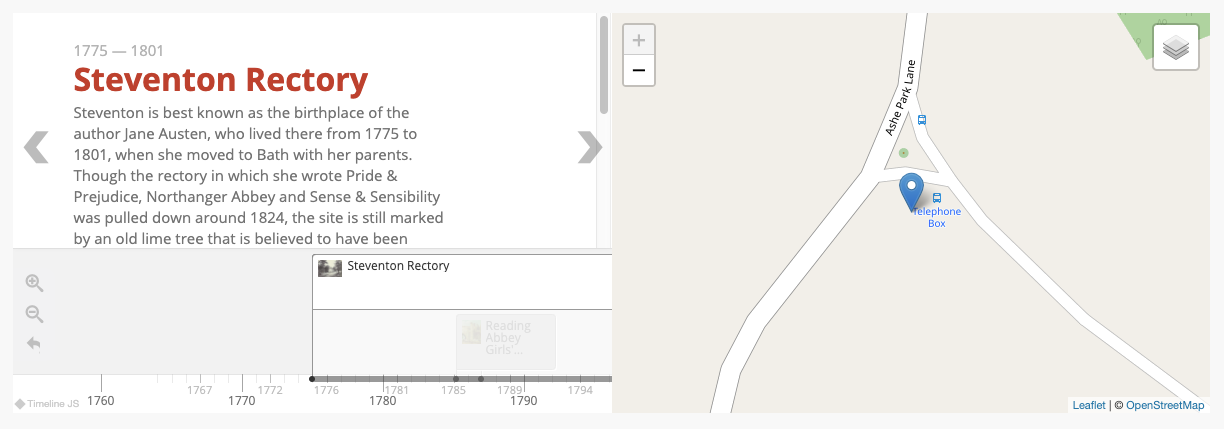
Timeline
Timeline ajoute une vue chronologique à la gauche de la carte. Cet affichage est dépendant du module Numeric Data Types et nécessite au moins un contenu avec une propriété Horodatage ou Intervalle (appliquée via le modèle de ressource).
Title headline : s’affiche sur la première slide de la chronologie (voir « Affichage public de la chronologie » ci-dessous). Cette propriété vous permet de nommer la chronologie.
Title text : s’affiche sous le titre sur la première slide de la chronologie (voir « Affichage public de la chronologie » ci-dessous). Cette propriété vous permet de donner des éléments de contexte ou de narration.
Fly to : menu déroulant qui permet d’établir le niveau de zoom pour chaque élément de la chronologie dans son affichage sur la carte. Les options sont la vue par défaut, ou des niveaux de zoom de 0 à 18. Le plus haut le nombre, le plus la carte sera zoomée.
Notez que la transition entre les différentes localisation est animée : si celles-ci sont très éloignées, la transition consistera en un fort zoom arrière puis avant.
Show contemporaneous events? : définit l’affichage de deux événements ayant le même horodatage ou le même intervalle temporel. Si la case est cochée, les événements contemporains s’afficheront tous deux sur la carte en même temps.
S’il s’agit de deux événements avec le même horodatage, par exemple « 1er janvier 2001 », ils seront tous deux affichés sur la carte quand l’un ou l’autre apparaîtra dans les slides.
S’il s’agit d’intervalle se chevauchant, par exemple si un événement correspond à l’intervalle « 28 juillet 1914-11 novembre 1918 » et l’autre à l’intervalle « Janvier 1819-décembre 1920 », les deux événements s’afficheront sur la carte lorsque l’un ou l’autre apparaît dans les slides.
Ce paramètre ne fonctionne qu’avec la vue par défaut de la position de navigation chronologique définie ci-dessous.
Timeline navigation position : par défaut, la chronologie s’affiche dans les slides à gauche de la carte. Vous pouvez changez son emplacement avec les options de ce menu déroulant :
Position par défaut
Pleine largeur, en dessous des slides et de la carte
Pleine largeur, au-dessus des slides et de la carte.
Propriété : menu déroulant ; sélectionnez la propriété d’horodatage ou d’intervalle temporel à utiliser pour remplir la chronologie. Le menu déroulant affiche les propriétés qui ont été définies comme utilisant les types de données numériques Intervalle ou Horodatage.
Il est conseillé de noter quelles propriétés et types de données numériques vous utilisez avant de créer le bloc de la carte. Le menu déroulant n’affiche que les termes et types de données mais pas les modèles de ressources auxquels ils sont associés : par exemple,
Date (numeric:timestamp).À noter, vous ne pouvez sélectionnez qu’une seule propriété par chronologie. Vous ne pouvez pas mélanger des données d’horodatage et d’intervalle.

Pour retirer la chronologie d’un bloc de carte, cliquez sur le « X » à la droite du menu déroulant Propriété.
Pour vois l’affichage public des différents paramétrages, voir la section Vue publique de la chronologie ci-dessous.
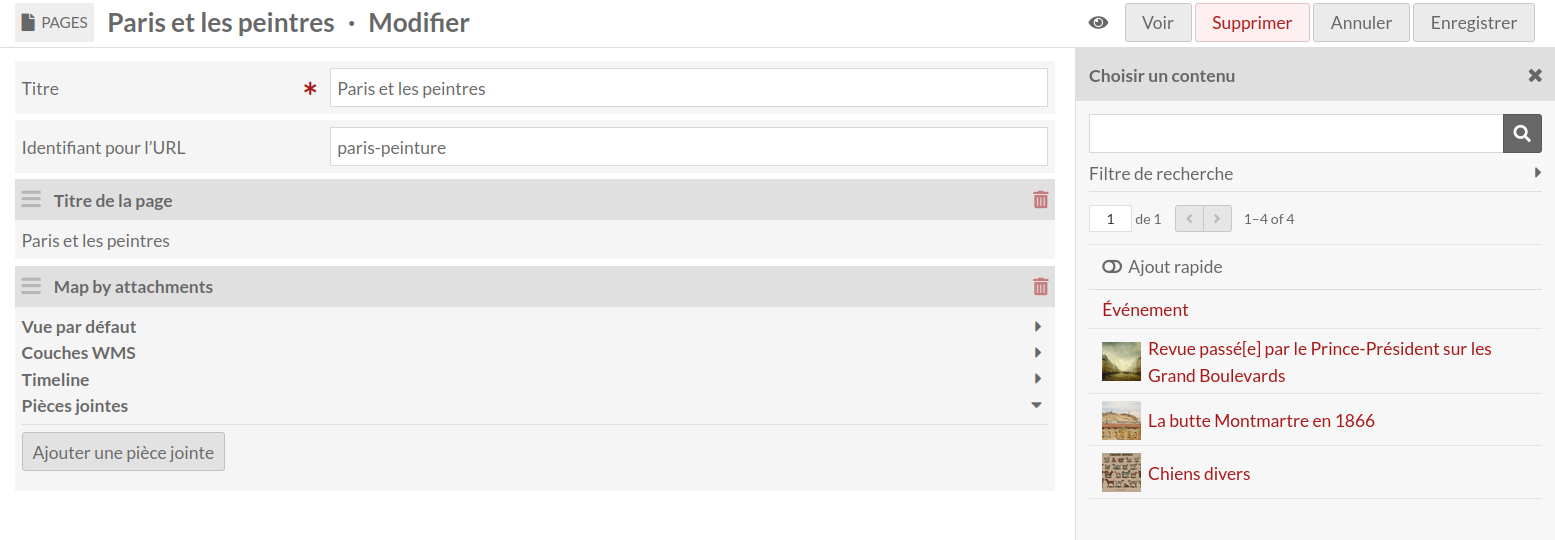
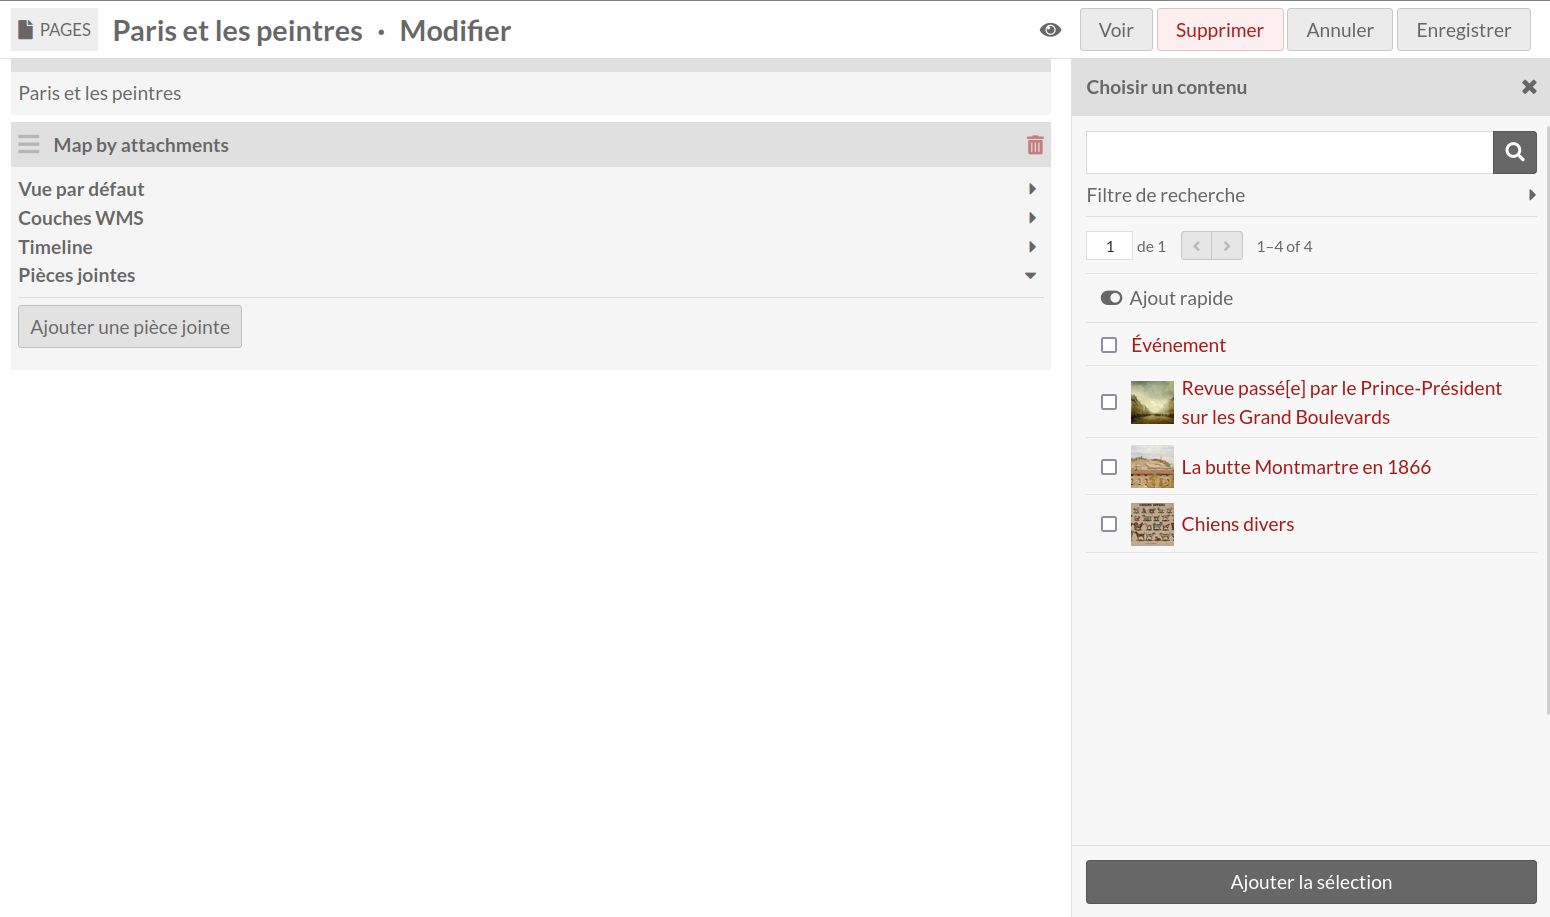
Bloc Map by attachments
Des marqueurs sont ajoutés à la carte en utilisant des Contenus.
Cliquez sur « Ajouter une pièce jointe » (1) pour sélectionner des contenus au sein de la liste qui s’affiche dans le volet de droite. Note : cette listes ne contient que les contenus qui ont au moins une localisation associée (lors de la création ou de la modification de ces contenus).
En cliquant sur un contenu, vous l’ajoutez à la liste des pièces jointes (3).
Cliquez et déplacez les contenus de la liste pour les réorganiser.
Supprimez des contenus en cliquant sur l’icône de poubelle.
Pour ajouter plusieurs contenus à la fois, cliquez sur l’interrupteur « Ajout rapide » au-dessus de la liste de contenus dans le volet de droite. Cette option ajoute une case à cocher à la gauche de chaque contenu. Cochez les cases des contenus que vous souhaitez ajouter à la carte, puis cliquez sur le bouton « Ajouter la sélection » en bas du volet.
Bloc Map by query
Pour utilisez ce bloc, il faut lancer une requête (ou recherche) dans les contenus. Copiez l’url qui s’affiche dans la barre d’adresse, du point d’interrogation à la fin.

Coller la requête dans le champ de requête du bloc Map by query. Aucun contenu ne s’affiche sur l’interface administrateur. Il faut se rendre sur la vue publique pour voir le résultat de la recherche.

Vue publique
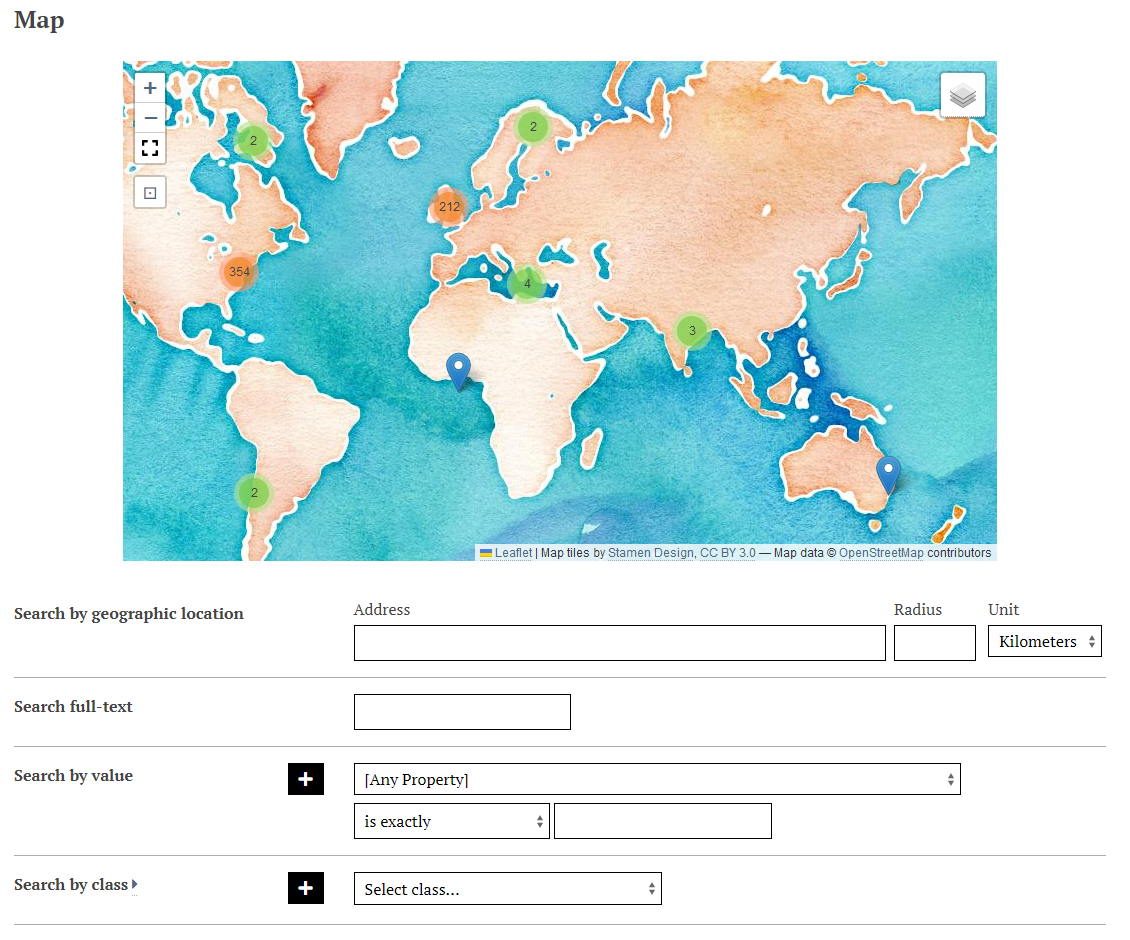
A map block will display on a public page or item page at the full page width. If you have settings in the default view of the map block, or have set default map bounds for the item, these should be applied. Otherwise the map will zoom so that all of the items are visible.
Viewers can zoom either using the scroll function of their computer or the zoom in/out buttons on the left side of the map.
Each item will display as one or more markers on the map. Markers which are close together will display as a cluster circle, with a number indicating how many items share that location. As you zoom in, these clusters will break open. Clicking on a marker will open a label for that marker.
Note that the following displays are slightly different in the Map Browse page.
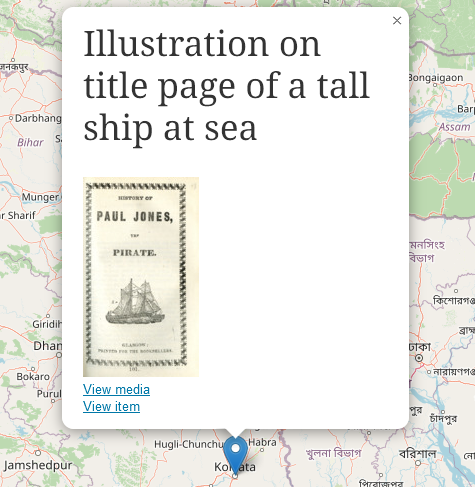
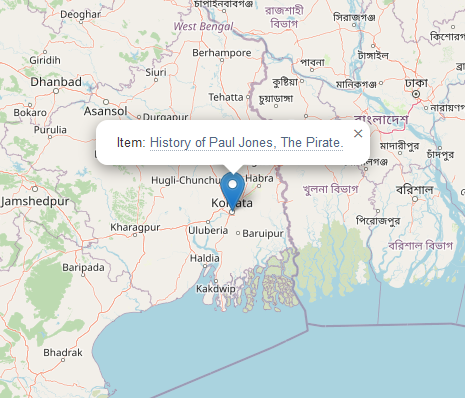
If you have not added a label or image for the marker, it will simply say « Item: [Title]. » If you have added a label, it will show the label, as well as representative media and a link to the media if the marker has one.
Marqueur avec seulement un libellé : 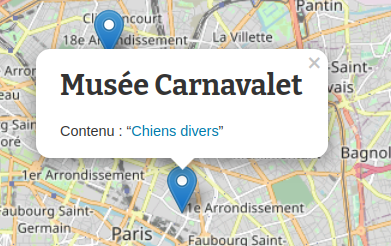
Marqueur avec libellé et image : 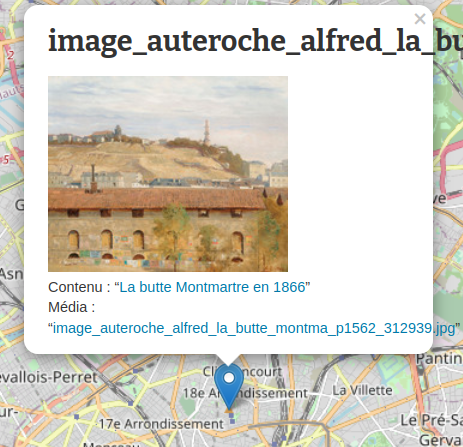
Item mapping marker with no label or image:
Vue publique de la chronologie
Timelines only appear in page blocks. The timeline will display to the left of the map, or above the map on mobile views. Each item appears on both the map and the timeline (meaning it will only display items that have both numeric dates and map markers).
On a map block with a timeline, the block initially loads with the map either at default view or zoomed to display all markers. The timeline will display the title headline and text, as seen below:
Dans la partie chronologie de l’affichage, les informations s’affichent au-dessus de la chronologie. La visionneuse de chronologie comprend aussi des bouton de zoom pour l’affichage temporel horizontal (zoomez pour voir les années, dézoomez pour les décennies entières).
L’utilisateur peut cliquer et déplacer sa souris pour naviguer vers la droite ou la gauche de la chronologie. Les flèches sous les boutons de zoom permettent de naviguer entre les slides.
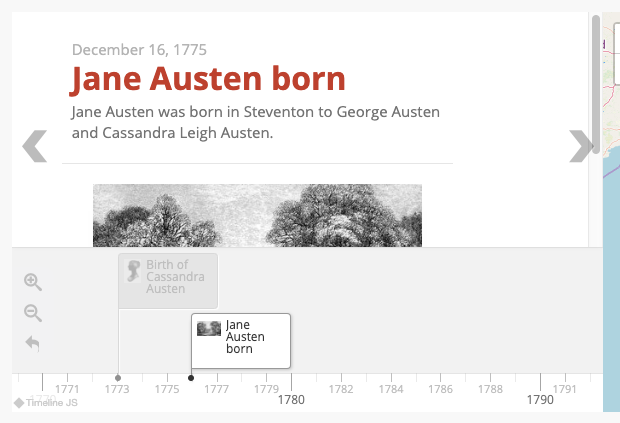
Clicking on a marker will display that item’s date or interval, title, description, and attached image. The information area has a scroll bar for longer material. The title acts as a link to the item’s show page.
Quand un contenu est sélectionné, son marqueur apparaît dans la chronologie en surbrillance.
Numeric:Interval appearance
Interval properties display as a long bar running horizontally across the timeline, with bars reaching down to the timeline at the start and end dates of the interval. Overlapping intervals will stack.
Numeric:Timestamp appearance
Timestamp properties display as a flag on the timeline, with one bar anchoring them to the timeline. Items which overlap either due to date or long text will stack.
Timeline navigation position
If you select « full width, below story slider and map » in the « Timeline navigation position » dropdown, the timeline and map will display as follows:

Si vous sélectionnez « full width, above story slider and map », la chronologie apparaît au-dessus de la carte.
Show contemporaneous events
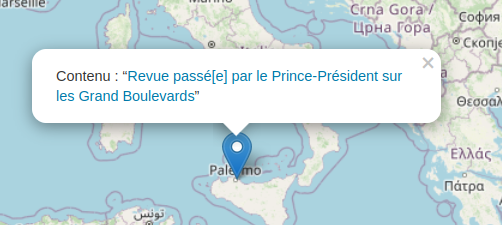
When « show contemporaneous events » is checked, the map zooms to display all events which take place on the same day.
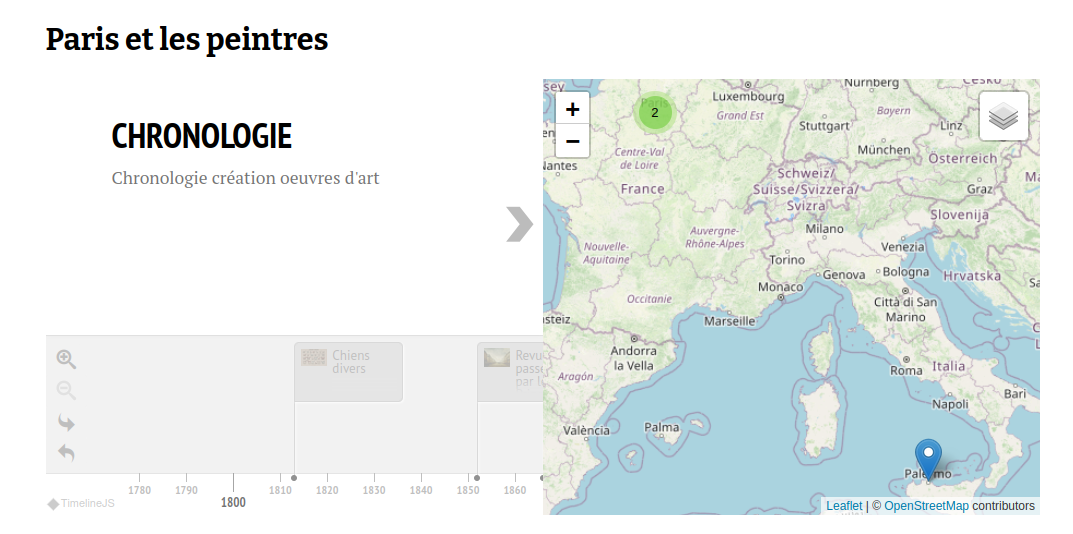
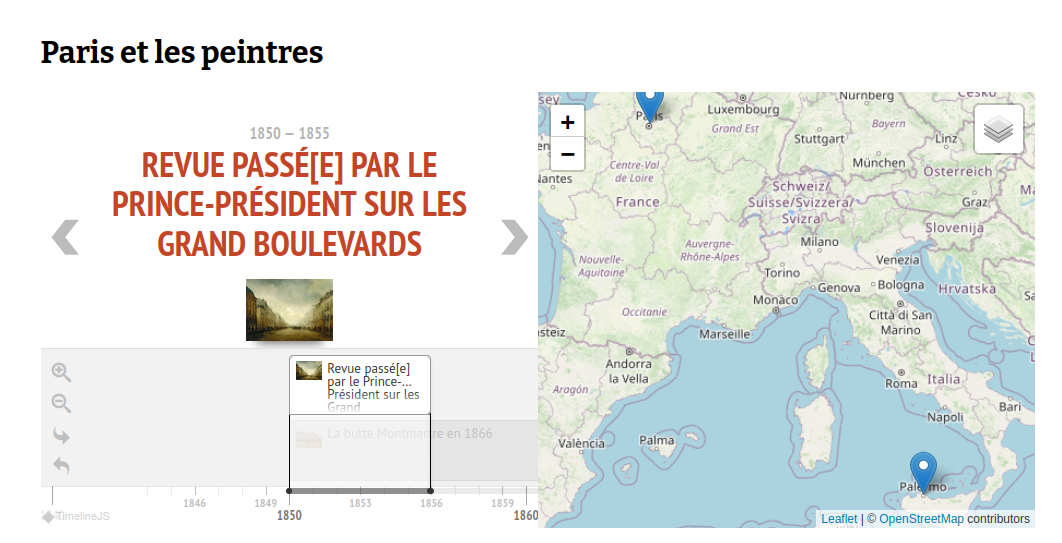
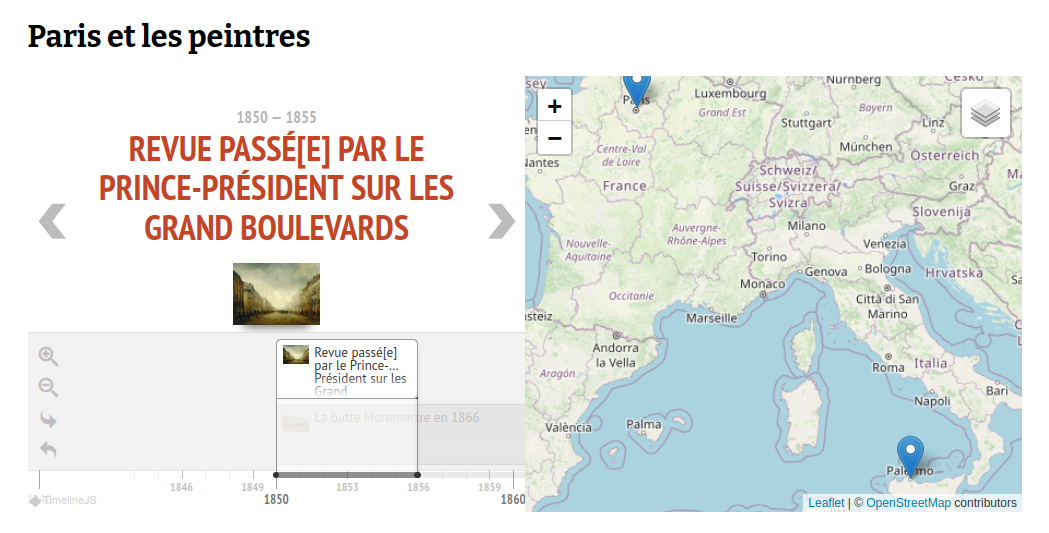
Dans la capture ci-dessous, la chronologie utilise des données d’intervalle. L’événement « Revue passée par le Prince… » a lieu durant la même période que l’événement « La Butte Montmartre » : la carte est zoomée pour afficher les marqueurs de localisation des deux événements.
Troubleshooting
Pour retirer les informations cartographiques d’un contenu, vous devez supprimer toutes les modifications de la carte associée. D’abord, supprimez tous les marqueurs (cliquez sur le bouton « Supprimer un marqueur », sélectionnez les marqueurs, cliquez pour enregistrer). Ensuite, supprimez les paramétrages de vue de la carte (cliquez sur « Clear the default center and zoom level »). La carte retourne à sa vue par défaut. Enregistrez le contenu et vérifiez que la carte n’apparaisse plus.