Administrative Dashboard
The administrative dashboard manages the content shared by all Omeka S sites and the core functionalities of the Omeka S installation.
This screencast walks you through the main features of the dashboard and navigating your Omeka S installation:
Navigating Omeka S from Omeka on Vimeo.
Admin main page
Lorsqu’un utilisateur se connecte, la première page qu’il voit est le tableau de bord de l’administrateur.
!!! note Depending on the user role, you may not see precisely the same options in the left-hand navigation. See below for details.
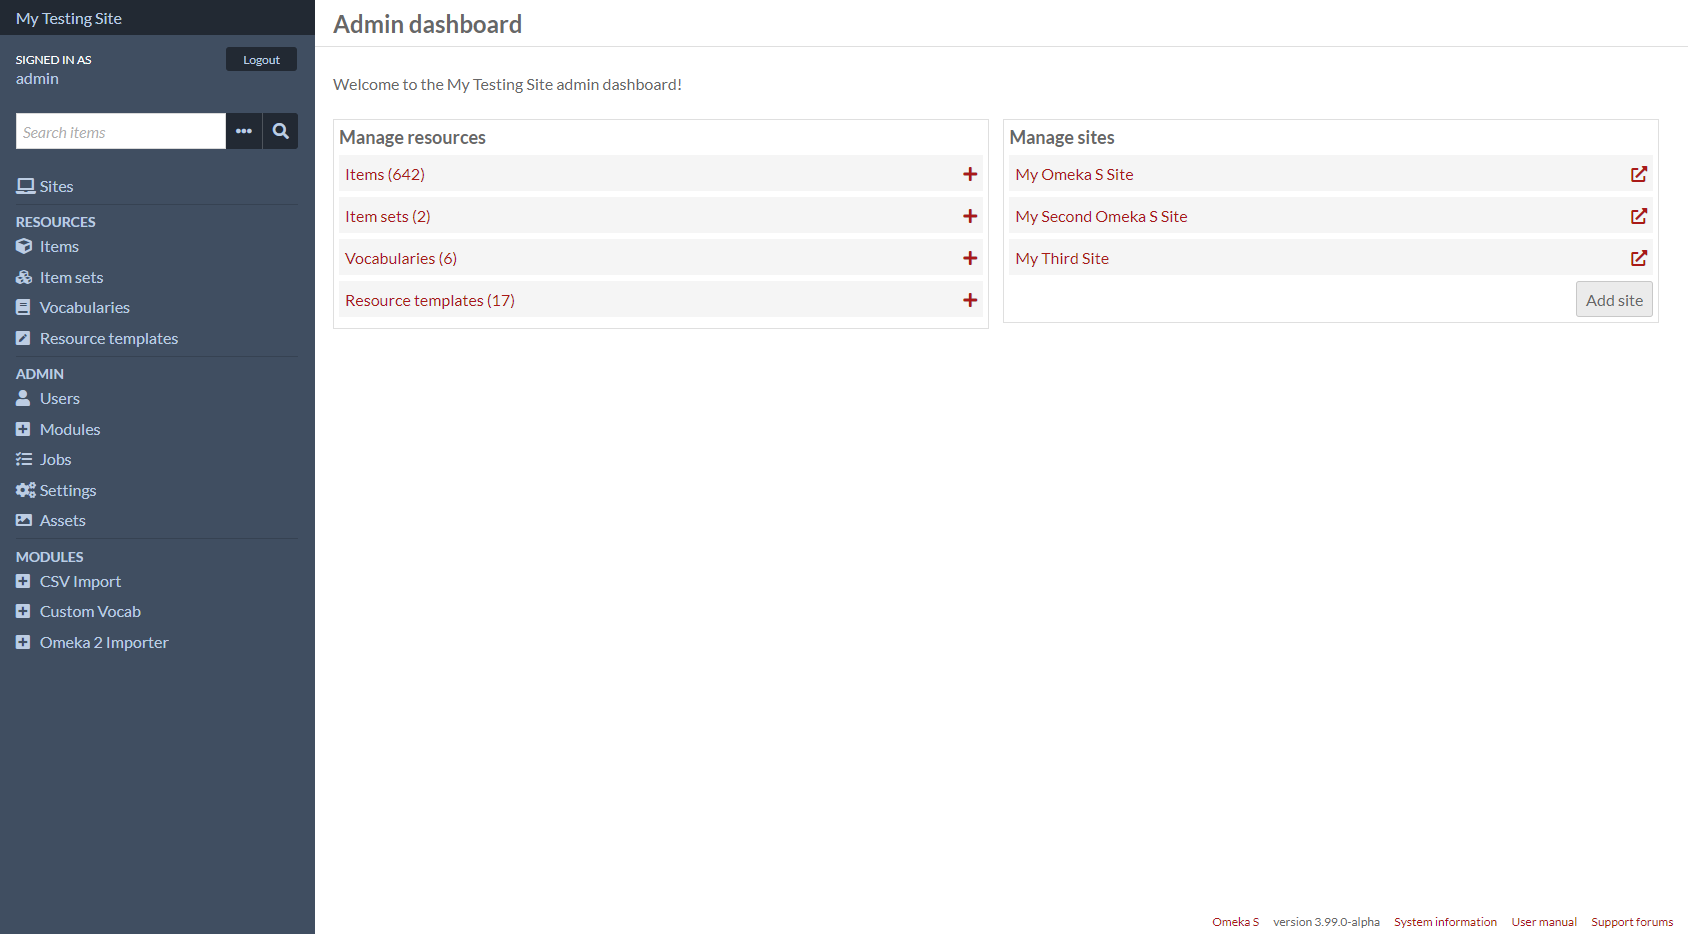
In addition to the left-hand navigation present on all pages (see below), the admin dashboard presents users with two boxes: Manage Resources and Manage Sites.
The Manage Resources box displays the following resources with their total count: Items, Item Sets, Vocabularies, and Resource Templates. Clicking on the label of the Resource will take you to the browse page; clicking the plus-symbol button to the right of the label will take you to the add page for that resource type.
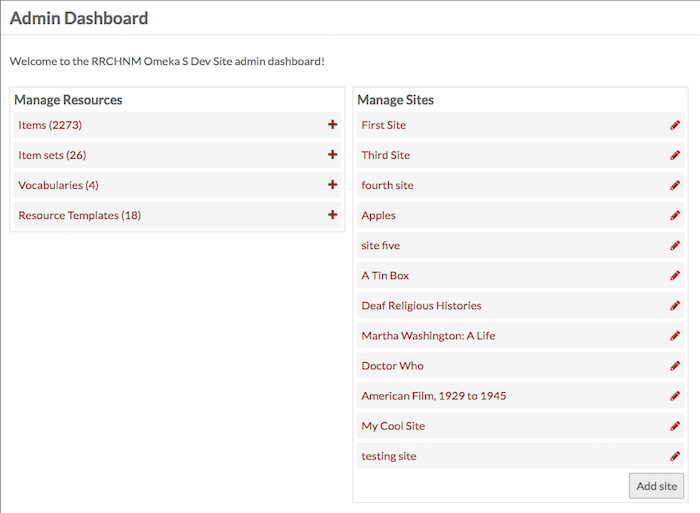
The Manage Sites box lists the Sites on the install. Clicking on the site name will take you to the public view of the site; clicking the edit (pencil) button will take you to the Edit Site Info page for that site.
Navigation à gauche
Le contenu suivant apparaît sur le côté gauche du tableau de bord de l’administrateur et sur toutes les pages administratives.
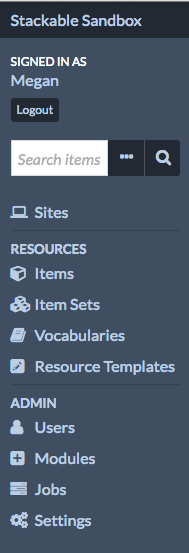
Dans le coin supérieur gauche de l’écran se trouve un lien affichant le titre de l’installation, qui vous ramène toujours au tableau de bord de l’administrateur.
Directly below the installation title is the message “Signed in as [User]” where [User] is the display name of the person logged in. Near the username (below or to the right, depending on window width) is the button to Logout.
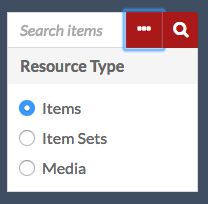
Underneath the user information is a search field which has an option for advanced search (ellipsis) in addition to the button to search (magnifying glass). Use this to search all items in the installation.
Advanced search options (the ellipsis) allow you to refine the search by Resource Type, limiting it to Items, Item Sets, or Media by clicking the radio button next to the Resource Type you want to search.
The left-hand navigation of the dashboard is divided into sections related to function and user access:
Sites: répertorie et donne accès à tous les sites de l’installation d’OmekaS. (Icône « ordinateur »)
Resources: content creation and metadata management.
Contenus : gérer les contenus individuels de votre instance. (Icône « boîte »)
Collections: gérer des groupes d’éléments agrégés. (Icône « Plusieurs cases »)
Vocabulaires : gérez les normes de métadonnées pour votre installation. (Icône « livre fermé »)
Modèles de ressources : gestion des ensembles prédéfinis (champs) à utiliser lors de la création d’éléments. (Crayon « icône carrée »)
Admin: installation-level administration (note that some of these tabs may not be visible to all user levels).
Users: manage users for the whole install and individual sites. (Human silhouette icon)
Modules : ajouter des fonctionnalités à vos sites. (icône « signe plus dans une icône carrée »)
Tâches : affiche les tâches activées par l’utilisateur en cours d’exécution. NB: les tâches ne s’affichent que lorsqu’elles sont en cours d’exécution. (Icône « trois barres »)
Paramètres : gérez les paramètres globaux de tous les sites, le tableau de bord de l’administrateur et les tableaux de bord du site. (Icône « rouages »)
Si vous avez installé des modules, ils peuvent apparaître dans la section admin de la navigation de gauche, sous les paramètres.
Notez que les utilisateurs avec des autorisations plus limitées ne verront que certaines de ces options de navigation.
System information
In the bottom right corner of every page on the admin side is the current version of Omeka S, along with some helpful links. Click the link labelled « System information » to see a full page with details about your installation.

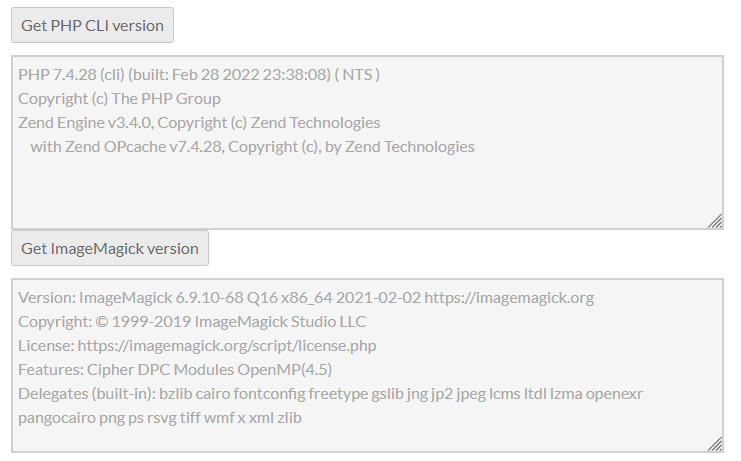
On this page you can verify the versions of dependencies that Omeka is using, such as PHP, ImageMagick, and MySQL. If a particular module requires your server to supply something like a PHP utility, you can look for it here. You can also look here to verify whether your Omeka installation recognizes a module you have tried to install.
You may be asked to supply the information on this page when asking for technical support on the Forums or when posting an issue on GitHub.
Clicking the two buttons near the bottom of the page can help you verify that PHP and ImageMagick are working properly for your site. Do this right after installation to ensure you don’t run into problems later on, such as when batch-importing items or running other PHP-dependent jobs.